Showing posts with label DIY around the home. Show all posts

Monday, September 21, 2015

Warli

This post has been lying around in my drafts bin for a while and today is the day it is going to see the light!

Warli art has been around for many many years. But lately I feel like its gained a lot of popularity. It is everywhere! Its on the walls of a civic building, on sarees, on dresses, on shoes - everywhere!

Obviously it is very eye catching and easy to draw too. I ended up buying may be a couple Warli adorned products and then I decided to make my own Warli.


These stick figures are so simple to draw!


For S's bday this year we went to pottery classes. It was super fun - getting hands all muddy with river bed clay. Throwing the mud on a potters wheel (This one was electric wheel) and pinching squeezing and pushing around the clay to give it many shapes was a great experience. 
Our teacher for the day was so passionate about the art and taught us well. May be that made the whole experience all the more enjoyable.


By around the same time I had also drawn a couple warli inspired drawings in my book and then I decided to paint it on to the pots that we brought home. :)


So here they are completely hand made - hand decorated, warli adorned earthen pots!
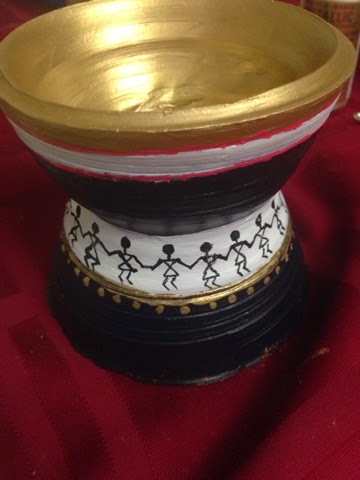


Happy birthday S! Cute looking pots to remember your 2015 bday - won't you say?! :)

Kundan rangoli

Its festival season!! Finally!

I feel like festivals bring in so much positive energy. They are a busy time, no doubt. Busy socializing, busy decorating, busy shopping, busy cooking and hence busy making memories year after year.

Living in an apartment community is not new to us. But a community that actively celebrates all festivals is a first. So, even if nothing special is happening at home on these festivals, simply going out and taking part in the community celebrations brings out the festival spirit.

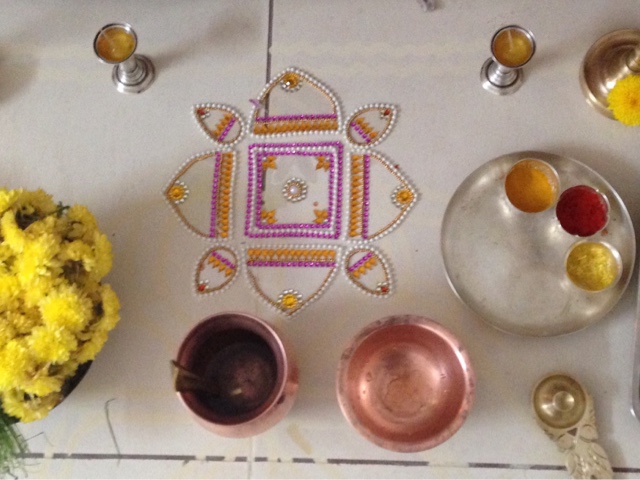
I had to take a (long) break from my crafting but the festivals have rekindled the enthusiasm to decorate. I made these Kundan (rhine stones) rangoli for Ganesh Chaturthi. One for home sweet home and one more for Amma's


Simple procedure -
1. Draw your design on paper.
2. Place that paper under an OHP sheet.
3. Stick stones on the sheet with glue as per the design you can see through the sheet.
4. Give it ample time to dry and then cut out the design


Supplies Needed:

1. Kundan Stones / Rhine stones
2. Fabric Glue - this dried clear and had held the stones well on the OHP sheet.
3. OHP sheet.
4. Scissors.
5. Design of your choice on paper.


This is how the first one turned out.
The best part it is rearrangeable, so you get many deigns out of one rangoli.


Changing the background is an option too.


Here is a look at the second one.


And this is how that turned out.


This is our beloved Ganapathi this year. We went eco friendly and opted for very minimal paint on the idol. S thinks we should take it a step further and get ganapthi who will stay with us for good, instead of having to get and dispose one each year. Not a bad idea!


This is the pink rangoli in front of Amma's Ganapthi.


Glad festival season is here and gladder that my craft supplies are out!

Friday, February 27, 2015

DIY Torana


My first attempt at a Torana. This also happens to be the first diy in this new home. 

Traditionally Toran - a sting of leaves tied at the top of the main entrance door to home, (most likely leaves from mango or neem trees) were meant to block insects and other germs because of their medicinal properties. But is this practice relevant anymore? But this tradition like so many others gives me a chance to make my home colorful and vibrant. So my twist on Torana will not repel insects but it sure does bring me joy, adding color and a tad bling to the entryway.


Very simple project. Here is what I used:
- Card stock various colors
- paint chips - various colors
- rhine stones - variety of them
- glue and scissors


Above is the template of each leaf in the torana. This is roughly measured and cut by hand.


Then I marked out the leaves on card stock and cut them up.


Then once I had all the card stock leaves cut out - I scored the top edge leaving about half an inch. This is to help fold them over the string easily.


Then I randomly picked colored paint chips and cut up rectangles and pasted them on top of the leaves.


Then just decorate with rhine stones.


There he is little Mr. D at my work station.


He are all the leaves stung together.


I love the colors.


Tied to the door :)


What do you think?


Wednesday, September 10, 2014

Somebody Stop Me!!

I have been painting quite a few peg dolls in the past week. Another fellow crafter told me I wasn't going be to able to stop painting dolls once I start off... SO true!

Here is a snapshot of all the tiny people that have joined us in our home...


The ladies! :)


The men...


The men and the boy...


And... .here is Everyone!


And I have 8 more unfinished peg dolls waiting in my mail box. Oh No! what have I done :)
Lucky for me - The dolls festival - Navratri is just a couple weeks away and I am ready with gifts for all our friends :)


Linking it to:
Made by you mondays
Sunday showcase
caffinated crafters

Friday, September 5, 2014

Wooden peg dolls

It is Doll season. What I mean is Navaratri is around the corner.
So I tried to paint some wooden pegs as Radha and Krishna.

The design and colors are inspirations from across the internet. Thanks Ambika for tips on Painting wooden dolls. Ambika has a lovely store on etsy. Do check it out.

Unfortunately this time I do not have any step by step pictures - just the finished ones.


Linking to Sunday Showcase.
wake up wednesdays