Monday, October 28, 2013

DIY dry erase board

Of late we have been falling short of space on our dry erase board stationed on the refrigerator.

Grocery list, general to buy list... Now we even have a list of food for D. He tends to get bored with repeated food soon, so I have to have a sizable loop of food items that I circulate among, to make meal times easy on us.

Coming back to dry erase boards, to get more dry erasable space, I decided to re-purpose this simple photo frame from ikea. As usual, pinterest was full of ideas on DIY boards. Glass is a great dry erase surface.
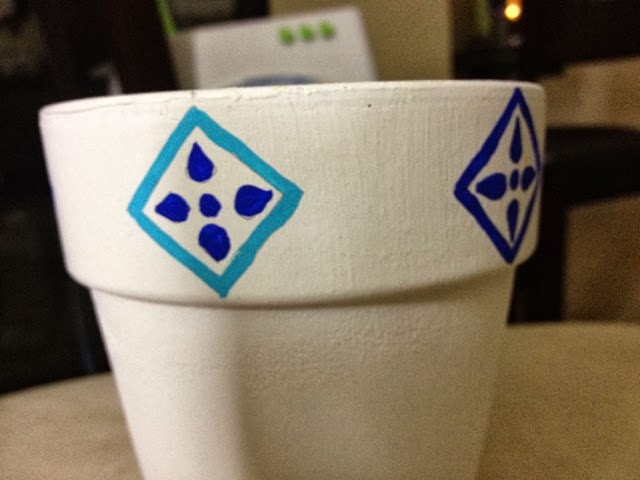
I had this frame and scrapbook paper on hand. Cut the paper to fit the frame. Framed it and hung it. All ready to write upon! That simple really! You can see the hand painted pot in the picture too :)


Closer look at the board.


Update: over the weekend along with some Diwali crafts, I also managed to spray paint the frame to my current favorite color- white! I think the white looks better - much quieter and blends well with the background.

Friday, October 25, 2013

Play houses

Last thursday, we had a Day of Service, at my work place. As part of this we had to build play houses for kids of military personnel. A total of 9 houses were built and donated to military children.

It was a day long event. The organization which helped us build these play houses had pre-cut the big wooden frames. So we had to paint the whole thing, attach the windows doors and frames, paint art work on the houses with the theme requested by the child who would be the future owner of the house.

The day started out cloudy. But by the time the second session came around, which is when I was volunteering, the sun was out and the spirits were high :)

The theme for our house was Dinosaurs, Bugs and Spiders. Our small team of 5 was incharge of painting both the side panels of the house. The others on my team were excited to drill holes and screws to put up frames and windows. But they were a little hesitant when it came to putting up art work on the walls. So I decided to brave it and try my hand at large scale drawing and then painting. My first time ever doing such large drawings!  We looked up pictures on the internet and soon there I was duplicating them on the walls of the house. I thought I did a decent job.

Here is how the house finally came together.
The front:


One of the sides: All drawings by yours truly :)


Back of the house


Finally the other side of the house - again all drawings by yours truly. 


Here are glimpses of some art work on other play houses.


There had to be a mickey mouse themed house :)


Coming back to our play house: I personally liked this spider a lot :) I think this cheerful little fellow added a happy touch to the house.


Also the huge butterfly turned out colorful :)


In all, it was a day of many firsts: First time volunteering at my this (relatively new) work place. First time building a play house. First time working with my team in a non work related scene And first time painting at this big scale and on wood. :) This definitely was my art / creativity fix for the week.

Monday, October 21, 2013

More earrings

This weekend was pretty tight. Amma left for India. Could not get around to do much crafts. 

Baked these earrings, yet to paint them.
Hope to get things done over the course of this week. 

Will be able to complete some more simple Diwali DIYs and gifts for my girl friends :)


Monday, October 14, 2013

Lamp shades for Diwali.

Completed the wine glass lamp shade today. Made 4 of them.
Few days ago you all had a sneak peek here.

These are so simple and satisfying! I like such projects - they are quick and they look good - satisfaction of having completed something. In between some involved projects its good to have some of these.

So I looked up online for the template and I found lots and lots. Scalloped edges, straight edges and various holiday themed printables. All you need to do is search and pick what you like. One such template can be found here.

I traced out the shape on my card stock and cut them out (seen below in purple and green). I wanted to add a trim with the damask paper and so I used the same template but made it much much shorter and cut it out. You can see the damask trims in the picture too.


These are the 4 colors I had picked. I glued the damask trim onto each of them.


I had some glitter glue on hand. I ran the glue tube on the top edge of the shade. I used Gold colored glitter.


Another look at the glitter glue edge.


Then I applied glue on one of the inside edges of the shade and attached it to the other edge giving it the conical shape.


I went ahead to add some faux kundan - which is very similar to rhine stones - in Indian markets they sell them as Kundan. They are available in a variety of shapes and colors.

I have wine glasses with a gold shaded stem, which works well with these shades.
I am debating between real tea lights and led ones. May be I will end up dropping led tea lights in the glasses, lets see.
Plan is - on Diwali evening - to have a 2 of these lamps on the dinner table and 2 more around the home. Or if its not too crowded, all 4 on the dinner table.


And now for the link parties:


Saturday, October 12, 2013

White terracotta pot

Picked up these lovely stems few days ago. They come in such wonderful colors.


I liked Royal blue the best - picked up that and silver stems to go along with the blue.


Also picked up a terracotta pot and painted it white. My color scheme for the pot was white and blues.
Then it was time pick a motif to paint over the pot. After trying a few I settled for this one below.


The pattern in blues.

The space in between was filled up by blue flower shaped kundan.

I realized, to paint this motif again many times to fill up the pot would be hard for my not-so-steady hands. So I decided to migrate away from this design a relatively simpler one, while sticking to the same outline/shape.

And I figured the painters tape will help my not-so steady hands and it definitely did help. The outline did come out a little better.


Time to add the stems. I stuffed paper in the pot to hold the stems in place.

Topped the stuffing with Aluminum foil, keeping with the glitter of the project.


Sweet lil D liked the pot! Here he is testing the texture of the stems :)


Diwali is coming up. Festival of lights this year, is in the first weekend of November. This pot could be the center piece of our Diwali dinner table. Oh! eager we all are for Diwali!

Link parties:


Tuesday, October 8, 2013

Gift card holder

This is such a simple diy - I don't think I will ever buy a gift card holder again.

Things u need :
Scrap book paper
Scissors
Glue 


I measured the sheet of paper enough to cover the card on both sides and tall enough to cover the height and a flap to fold over on ends.
I saw this template online and roughly cut out the same shape on my paper


Fold along the edges as seen in the picture above. Then glue the center vertical portion first and then the flap on the bottom.


Let it dry and slip ur card in. I used a piece of tape to secure the open end. That's it! You have your own homemade gift card holder :)


Linking this to 

Monday, October 7, 2013

Blue jhumki

Found a mould to make the jhumki shape. This was listed as a mould to make miniature bowls. Worked out just fine for Jhumkis. Now I can get the same jhumki shape not just twice consistently but many many times.


Attaching the small beads at the bottom is patience intensive work!


Again the colors and the paint is something that I am not totally happy with - I have to figure out how to make the paint even and not blotchy. The top bead is of a color called halo blue gold - tried it for the first time and I feel there is a lot of hope for this color. You might see it more often.


Here is a link to a detailed step by step instructions on handmade clay jewelry that I wrote up.

Linking it up to 

Sunday, October 6, 2013

Birthday earrings and Felt box

This is a double DIY post. One handmade terracotta earrings and two - DIY Stiff felt box.

Oct 5 was the birthday of a cousin sister. I thought what better gift than handmade earrings.
So made these specially for her. I wanted it to be something which she should be comfortable wearing even to work.


While I was waiting for the first coat of paint to dry - I made this lovely gift box, it is that quick and simple.
Sometime in the past 2 weeks I remember pinning this very simple tutorial of how to make a box out of stiff felt. Picked up one stiff sheet at Michael's - just to try it out.
Here is a link to the original tutorial. This is how it ended up - I improvised the lid a little bit by adding a washi tape trim and sticking a kundan piece on each face


One more look at the box...


And the earrings...


Happy Birthday dear sister! :)

Linking up with:

Found these link parties at My Girlish Whims blog- Thanks!

Wednesday, October 2, 2013

Beads

Kept it quiet last night - just painted some beads.
Tried out some new colors from Lumiere. The Met. Russet color is a favorite so far! :)
(the cluster of 4 on the right top in this photo below)


I should have enough beads to finish up the brass pendant into a necklace.


On side note - I never thought I would be able to use this agarbatti holder again. Our dear generously energetic D, tried his strength on this agarbatti holder and the sides gave way :)
He started daycare at S's this monday and its been 3 days and he is holding up well. I think he likes this better than M's. 

Update on Oct 2, 2013:
I managed to use the beads to finish up the brass pendant into a necklace.
Will pair it with the red hoop Jhumkis to be worn with a red bandani saree.


Update on Oct 5, 2013


At S's friend's place - They invited us for Golu. 

Tuesday, October 1, 2013

Sneak peek - lamp shade

Earlier I found a good idea at the blog all things beautiful. Block printed paper lamp shade for a wine glass lamp.
Drop a tea light in you wine glass (the lamp) and make a lamp shade using block paper.

I was not able to find block printed paper in the usual 2-3 places that I shop - so I settled for these scrap book loose papers that found at Michael's.


I like how earthy the color combination looks. The plan is to have the lamp shade done in the solids and each shade will have a damask border. Here's hoping this turns out well.


This is how allthingsbeautiful's lamp shade looks:


And then I looked up online for a lamp shade template and I found some really pretty completed lamp shade projects. Looks like this lamp is pretty popular for parties such as wedding and birthdays. Here are some pictures of projects that I thought were really pretty.


Cant wait for Diwali! :)